I don't think I've ever posted pictures of my entire K4 platoon, and since I am feeling expansive; here they are;
The K4 is a fictious Soviet design, based on the UK/US Mark VIII
'Liberty' tank, or at least thats how I've used it in the Rocketman games. In
actual fact these models are
actually Indiana Jones toys from Disney which I have slightly modified
for use in 28mm wargaming. The first toy was given to me about eight or
nine years ago by some one from the old Wargames on the Web forum who had been to Florida and seen the
toy in Disney World, but alas my memory serves me poorly and I forget who it was (was it you Paul?) I bought three more of them on e-bay as the years
passed. These were my first 28mm tanks (except for a 1/48 FT-17), and they were a lot of fun to
rebuild and use. If you can find them they are very easy to convert.
The fourth model has been converted to be a command tank - and it hasn't been quite finished yet.
Showing posts with label Tanks. Show all posts
Friday, February 27, 2015
Wednesday, February 25, 2015
The Suffolk Tank
Here are a few pictures of my recently finished, fictious tank; the 'Suffolk'.
Painted in African camouflage, the Suffolk is meant to be a secret American tank, designed and built as part of a classified weapons programme in the early 1920s but then due to neferious political machinations, later sold off as surplus to an African rebellion in 1937. The idea is that after WW1 the Americans were worried about the possibility of a conflict with Britain and given the large Canadian border, and Britain's superiority in armoured fighting vehicles at the time, various rich and politically powerful Americans initiated a secret tank building conspiracy. From this came the Suffolk assault tank, the Thunderbolt infantry support tank (as yet still under construction) and the aforementioned Ford Liberty tankette. At the time the Rocketman games take place, these tanks have all become usefully obsolete and through some convenient military industrial connivance, available for sale to a budding African nation which is rapidly taking over the Belgian Congo and seeks to liberate/annex French Equatorial Africa. The big idea is the possibility of games pittiing my French tanks against these American-Africans.
Armed with a hull mounted 75mm gun, the Suffolk is an assaut tank designed to lend support to the 'Thunderbolt' infantry support tanks. For protection to the flanks, the Suffolk also has two side mounted .30 machine guns.
Friday, January 09, 2015
Ford-Liberty M1920A1
...and I'm back!
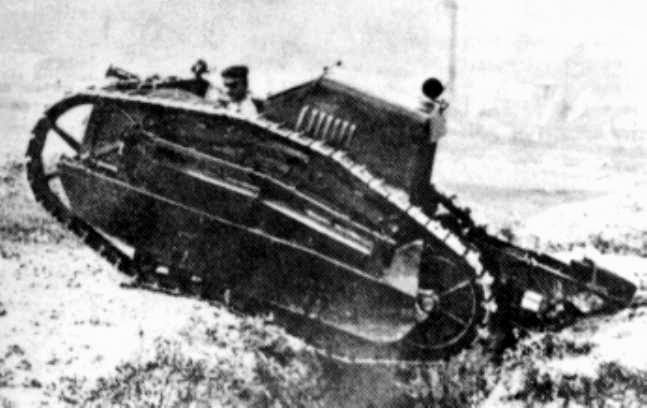
I haven't had anything worth posting about for a good long while since I've been pretty down in the dumps for the most part of 2014, and working too. Over Christmas however, I got down to some modelling and amongst other things, built myself a fictional tankette. I call it the Ford-Liberty M1920A1 and its meant to be secret American evolution of the Ford 3 ton tank for future Rocketman games. The last two images show the tank finished, next to my previous model, the 'Suffolk tank'.
Tuesday, March 04, 2014
RM12.1 The Return of the Black Guards
Conclusion
This game was played on 22 February 2014.
Players were Jan, Andreas, Goeg and Palle.
For convenience, I shall refer to the left and right flanks as seen from the perspective of the map.
Both sides deployed across their edge of the table with the Black Guards (Palle and Goeg) deploying their tanks at once. Goeg positioned his first tank on the left flank, guarding the forest road, and he placed his second tank on the parallel road, facing towards the bombed out tank factory. Palle placed both his heavy tanks in the open ground of the far right flank, using the trees as partial cover and left his light tank to cover the ruins of the centre. Andreas placed his commander's tank in the trees facing Goeg's tank on the left flank. He left his second tank off map. Jan placed all three of his tanks in the centre ground of the railway siding. Palle and Goeg concentrated their infantry behind the central ruins whilst Jan and Andreas spread their infantry between the centre and left flank. Most all of Andreas' men were on the left flank.
Firing commenced with Goeg opening up a barrage against Andreas' forces on the left flank. Having established that the T-28 was impervious to his K4's guns, Goeg turned his attention to the infantry. He kept up a prolonged barrage that lasted for most of the game and which, despite their using cover to their best advantage, eventually annihilated a large proportion of Andrea's foot soldiers. Jan's Aglatean infantry hesitated for lack of movement points and were unable to move much from beyond their initial starting ground.
Both sides held their ground cautiously for most of the first half of the game. Palle and Goeg were wary of the T-35's greater fire power, and Jan and Andreas were out numbered. The T-35 dominated the central ground but largely by default as it wasn't really being challenged. Eventually Goeg moved his second K4 heavy tank up the central road but Jan countered this with his light tanks, blocking the road and using the flame thrower tank to set fire to the tank factory building.
Palle edged his two tanks closer up the right flank in order to find a way of combating the T-35, but this was countered by Andreas who brought his second T-28 onto the map, behind the rail workers shack (not actually shown on the map as it was a later addition) on the far right flank. Trying to establish a lethal cross fire was very much the order of the day with both sides having difficulty bringing enough guns to bear to do any serious damage.
With both sides idling in an apparent Mexican stand off, Andreas then played his joker, a Polikarpov I-16 with six underwing rockets and twin 20mm cannon. He deployed his aircraft against Palle's tanks which were close enough together to bring them both within the rockets damage radius. Unfortunately Andreas rolled badly (both sides were plagued with poor dice rolls all day) and the joker failed. Palle continued to edge for a good firing position with both sides trading ineffectual shots across the right flank.
Eventually Goeg brought his second K4 far enough up the central road to threaten the T-35 from the left. Palle brought both his tanks up and threatened from the right. It looked for a while as if the T-35 might be knocked out, allowing the Black Guards to secure the centre. Whilst this was happening however, Jan's two light tanks were moving in and around the centre with the twin turreted T-26 engaging the infantry who were trying to close on the storage building (even running some of them over) and the Kht-26 flamethrower tank moving right around the left flank to approach from the rear.
The game ended before either side could deliver a decisive attack and the end result was a narrow victory to the Black Guards, largely thanks to the initial bombardment of Andrea's infantry by Goeg's command tank on the left flank.
I think we had a good game and fun was had by all. I missed Oleg's presence, but in a way he was with us in spirit as the tank factory was one of his models I had completed, and then named after him. There will be a smaller follow up game in the next few weeks but Andreas was only with us for the one session unfortunately as he lives in Oslo.
Friday, January 03, 2014
Turrets galore!
Happy New Year, one and all!
Here, painted over the Christmas break (despite a god awful crick in my neck) - is my Soviet armoured unit, originally bought (from AGNM) for Rocketman games, for which hopefully they may yet be employed. They are (at the back) a T-35 heavy tank, two T-28 medium tanks and at the front (left) a KhT-26/OT-26 flamethrower tank and (right) a T-26/M-1932. Together these five tanks boast no less than fourteen turrets.
Saturday, December 28, 2013
Thus endeth the year
Twas an 'annus horribilius' really, in many ways - what with my best friend dying suddenly. I've been in the dumps ever since. I decided to use my spare time over Christmas to paint the big Soviet tanks I bought a few years back. They've been sitting, unassembled and unpainted in the cabinet for so long, that I thought perhaps I ought to do something about them, and its been at least eighteen months since I last painted anything. This brought my old plans of Rocketman adventures with Oleg to mind, and it has not been easy. Top Gear and Jeremy Clarkson's You Tube videos have kept my mind from obsessing, and slowly the tanks have taken form. I don't know if I'll ever use them, but at least they'll look good on their shelf. I'll post some pictures once they are finished.
In the meantime, I've discovered a new band, Au4. I think they are from Canada but I'm not sure.
Sunday, December 15, 2013
Sunday, November 17, 2013
Mold making attempt number four
There hasn't been much to post recently, but now, finally, I have some progress worth blogging about. I have begun to make the mold for my 1920s assault tank (I have yet to think of a good name for it)
The top three image show the model embedded in white clay and ready for the first layer of silicone. I chose to use clay this time around on the basis of a video I saw on You Tube, and because neither plasticene nor blu tack had been satisfactory. The tank is tilted in order to facilitate pouring the resin without trapping air bubbles. This is the biggest mold I have attempted to date. When finished it will weight approx 1200gr, which with the price of RTV silicone in Denmark, comes to about £146.
Having poured the first layer, I compared it to the original maquette I made. Since it has the exact same dimensions, I could see the top of the model was only covered by about 5mm of silicone. This didn't seem much, though in theory it ought to suffice. I decided to play it safe and added another 200 gr of silicone.
This is the current state of affairs. The silicon has cured nicely (it is fantastic stuff), and I have removed the clay. It took about an hour but as the clay is water soluble, it was easy to remove without doing any perceivable damage to themodel, though it has stained it slightly. I shall give it another wash tomorrow before I pour the second layer.
Yours truly, now with full protection, and music whilst I work!
The top three image show the model embedded in white clay and ready for the first layer of silicone. I chose to use clay this time around on the basis of a video I saw on You Tube, and because neither plasticene nor blu tack had been satisfactory. The tank is tilted in order to facilitate pouring the resin without trapping air bubbles. This is the biggest mold I have attempted to date. When finished it will weight approx 1200gr, which with the price of RTV silicone in Denmark, comes to about £146.
Having poured the first layer, I compared it to the original maquette I made. Since it has the exact same dimensions, I could see the top of the model was only covered by about 5mm of silicone. This didn't seem much, though in theory it ought to suffice. I decided to play it safe and added another 200 gr of silicone.
This is the current state of affairs. The silicon has cured nicely (it is fantastic stuff), and I have removed the clay. It took about an hour but as the clay is water soluble, it was easy to remove without doing any perceivable damage to themodel, though it has stained it slightly. I shall give it another wash tomorrow before I pour the second layer.
Yours truly, now with full protection, and music whilst I work!
Sunday, October 13, 2013
Success! (I think)
Step one. I added two model parts, a command cupola and an external fuel tank, to a sprue.
Step two: I built the mold box using perspex.
I wasn't sure how to proceed from this point because the instructions I was following called for the sprue to be placed in a bed of modelling clay, like plasticene or blu-tack and when I tried this, the pressures involved snapped the glued joints of the sprue. I decided to adopt a different approach and put a foot on the sprue so it could stand on a 1 cm bed of silicone.
Step three: Having laid a foundation of silicone, which I left to cure over night, the sprue was placed on top.
Step four. I needed keys, so I built a Lego frame and placed it along side the sprue.
Step five: I poured the second layer of silicone, making sure to be careful and avoid pouring the silicone over the model. This was quite difficult as the silicone is not an easy substance to control. I spilled quite a lot. I also found that my calculations were out by a good 25 grammes, and had to mix up a second batch in order for the silicone to reach the half way mark. Having completed this, I left it to cure over night again.
Step six: After having applied the release agent (Dow Corning 7) to the second layer, being careful to make sure the keys were well coated, I poured the last layer of silicone and let it all sit over night. In the morning, I was pleased to find the mold came apart with a satisfactory squelching sound, and everything seems to be in order. You can see on the image how the accumulation of release agent in the keys has softened the edges of the lego bricks. It is noticable that inside the depressions made the model parts, there is no such softening.
My improvised mold making work station in the attic

My improvised gas mask - I've ordered a real filter mask, the chemicals are pretty nasty, but it hasn't arrived yet.
Friday, September 27, 2013
Another model tank update...
Work on the Assault Gun progresses steadily. I've added seven hundred and forty nine rivets so far and I still have a lot of details to add. I've finished the exhaust pipe, and the gun is nearing completion. The command cupola is still just a shape that requires sanding and details. The sides and rear of the model still need additional details also.
At the same time I have begun two new models, though at this stage, I only intend to build their overall shapes. The first is a Heavy Infantry Support tank, and the second is a light tank, both based on 1920's designs.
The Heavy Infantry Supprt tank started off as another alternative to First World War British tanks, but when I came to draw up the dimensions, it mutated into something much bigger. First it became a twin turret design and then it lost its turrets entirely. Instead of a dedicated fighting vehicle, it is now a heavily armoured tank/personnel carrier. I'm still not certain about whether or not I'll add a turret.
The Light Tank is based on a 1925 Czech artillery tractor design, the CKD MT. In my version the two man crew sit in the middle of the tank, with the engine to the rear. The primary armament will be in the right hand side of the vehicle and I'll make at least two variants. One with a heavy machine gun and another with a 20mm anti tank gun. The pictures here show the second version of the hull, which, although wider than the original sketch, is 5mm narrower than the first version (which is shown below).
Various comparison pictures. The Last two show all my 'Morlock Models' together (Morlock being my casting project name). Starting from the left; 1920s Heavy Infantry Support tank. 1920s Assault Gun. 1930s 20 ton medium tank 'Heracles'. 1930s 12 ton medium tank 'Achilles'. 1930s 6 ton light tank. 1920s 5 ton light tank (first version).
Subscribe to:
Posts (Atom)


.jpg)


a.jpg)
a.jpg)
a.jpg)
a.jpg)
a.jpg)
a.jpg)
a.jpg)


a.jpg)
a.jpg)
a.jpg)
a.jpg)
a.jpg)
a.jpg)